Directory Application Dashboard Interface
The interface has both a standard crumb trail navigation at the top and a set of side tabs.

Click on Employees Tab to dive into database of people. Add New Employee or Edit existing.
- Employee Info
- Locations
- Departments
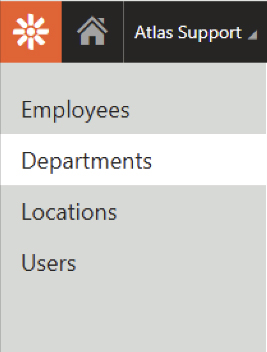
Click on Departments Tab to dive into database of departments. Add New Department or Edit existing.
- Department Info
- Department Employees
- Employee Priority
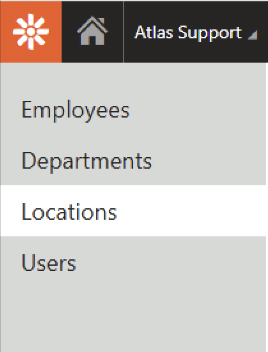
Click on Locations Tab to dive into database of locations. Add New Location or Edit existing.
- Location Info
- Location Employees
- Employee Order
Directory Icons
![]()
Click pencil icon to open editing window
![]()
Click trash can icon to delete database entry
![]()
Click dotted icon to clone database entry - not recommended
![]()
Click back arrow icon to move up one level of database
Click Directory Help button to jump to Directory Application page in Support Site.
Adding Employee Data
This information includes the basics such as phone, email, etc. plus the location(s) they work and the department(s) they work in.
The Department Directory Widget pulls in and displays the employees flagged by certain department(s).
The Location Employee Widget pulls in and displays employees flagged by location(s).
- In the Directory Application, navigate to the Employees tab and click on “New Employee” button
- Enter new employee’s first name, last name and photo at minimum. The Code Name will be automatically generated by the system. Add any additional information as needed.
- While still in the individual employee’s data entry dashboard, navigate to the Departments tab and click “Add Items” button to assign department(s) to this employee. The popup lists all the departments you have added to the directory via the main Departments tab. Check as many as applicable and click Select.
- While still in the individual employee’s data entry dashboard, navigate to the Locations tab and click “Add Items” button to assign location(s) to this employee. The popup lists all the locations you have added to the directory via the main Locations tab. Check as many as applicable and click Select.
Employee Data Properties
| PROPERTY | DESCRIPTION |
| First Name | Text entry (required) |
| Last Name | Text entry (required) |
| Title | Job title recommended. Location is also an option or any other consistent key info. |
| Bio | Text of any descriptive copy needed. This could be a paragraph about the person or any additional info that would be helpful. |
| Image | Image (required) 175 x 175 pixel photo or other image stored in media library. Note that the image size can be different from the recommended, for instance to accommodate a portrait image, but all images used in the directory should be the same dimensions for a consistent, professional look. |
| Image Title | Tooltip type text which appears on image hover |
| Image Description | Text describing details of an image to provide more complete information |
| Image Alt Text | The purpose of alt text is to describe visual elements to users who can’t see them, either because the image failed to load or because they are using a screen reader. |
| Phone (Office) | Number entry |
| Phone (Office) Extension | Number entry |
| Phone (Cell) | Number entry |
| Fax | Number entry |
| Email | Email address entry |
| Code Name (System) | Automatically generated by the system |
| Blog Author | Checkbox to administer blog authorship permission to employee |
Adding Department Data
Key departments are added to a list which will appear as a selection in the employee data section. This is the information that drives the content of the Department Directory Widget.
Employee’s appearance in a department directory can be ordered alphabetically but also by priority order. This affects the order in which they appear on the page in the Department Directory Widget.
- In the Directory Application, navigate to Departments tab and click on “New Department” button.
- Enter new department name then click the save button. The Code Name will be automatically generated by the system. Other data shown is optional. Continue to add as many department names as needed.
- While in the individual department’s data entry dashboard, navigate to the Department Employees tab to view all employees currently assigned to this department. From here remove or add employees to this department.
- While in the individual department’s data entry dashboard, navigate to the Employee Priority tab to view the order this department’s employees will appear on the page in the Department Directory Widget.
- Assign an order number by clicking on the pencil icon for each employee then entering a number into the Display Order field.
- If only one employee needs to be first and the rest remain in alphabetical order, simply assign the number one to that employee.
- To activate the Priority Order in the Department Directory ATLAS Widget click the properties. In the properties pop up, adjust the “Order By” setting to Priority Order. Be sure to select the correct department.
Department Data Properties
| PROPERTY | DESCRIPTION |
| Department | Name that will appear in any department selection menu |
| Title | Name that will appear in Directory list |
| Description | For internal use – add any identifying text to help with recognition |
| Alt Text | Alternative description |
| Code Name (System) | Automatically generated by the system |
Adding Location Data
This data includes specific GPS coordinates for mapping as well as address information, hours, and employees. Location data appears in the Location Employees Widget, Location Map Widget, and Location Card Widget.
- Click on “New Location”
- Enter Location data. Note that the two key properties for connecting to the live map are the Location Name and the Latitude and Longitude. Additional data can be added as needed.
- Click “Save” when complete but return any time to edit.
Location Data Properties
| PROPERTY | DESCRIPTION |
| Set as Default Location | Check if true. This will automatically pin the default location to the top of the locations list in the Location Map Widget. |
| Name (Required) | Location name which will appear on all map instances |
| Street Address | Text entry |
| City | Text entry |
| State | Text entry |
| Country | Text entry |
| Zip Code | Numerical entry |
| Phone | Numerical entry |
| Toll Free | Numerical entry |
| Fax | Numerical entry |
| Text entry | |
| Services | Checklist generated by Widgets Application. Check services for this individual location. |
| Featured Employees | List automatically generated by employee data section of Directory application |
| Latitude (Required) | GPS coordinate required for map pin positioning |
| Longitude (Required) | GPS coordinate required for map pin positioning |
| Hours | Flexible text area for hours information. Light HTML required for styling. |
| Description | Flexible text area for additional information such as fax number. Light HTML required for styling. |
| Image1 | Recommended size 320x160 pixels image stored in media library |
| Image1 Title | Tooltip type text which appears on image hover |
| Image1 Description | Text describing details of an image to provide more complete information |
| Image1 Alt Text | The purpose of alt text is to describe visual elements to users who can’t see them, either because the image failed to load or because they are using a screen reader. |
| Image2 | Recommended size 320x160 pixels image stored in media library |
| Image2 Title | Tooltip type text which appears on image hover |
| Image2 Description | Text describing details of an image to provide more complete information |
| Image2 Alt Text | The purpose of alt text is to describe visual elements to users who can’t see them, either because the image failed to load or because they are using a screen reader. |
| Order | Used for ordering the location and accepts 1 or 0 numeric value. If you enter 1, then that location would always appear on top of the list on live site page. |
| E-Commerce Location | For ATLAS ecommerce platform users only - This is used by E-comm/ Marketplace team to have the Store Location displayed for Retailers on E-comm platform. |
| ERP ID | For ATLAS ecommerce platform users only - This is used by E-comm/ Marketplace team to have the Store Location displayed for Retailers on E-comm platform. They track it by ERP ID. |
| Specialty Hours | (Data displayed in Specialty Hours Widget) Check box for additional entry fields to be displayed |
| Provide Details | Any additional descriptive text needed. Will appear on the page in the Specialty Hours Widget. |
| Monday - Sunday Hours | Check selection:
|